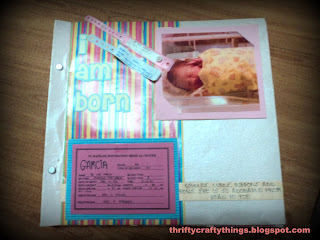
Have you ever made scrapbook pages from scrap? Well, I do. I have never bought pre-made scrapbook albums, EVER. I have only made my own. And what better material to use than plain chipboard. Yep, you read that right. Want to learn how to make your own? Then read on.
Probably, you might be thinking why on earth am I making my own, when I can actually just buy them, pre-made. The reason for that is because they aren't cheap, at least for me. I can't afford to buy an album with only 10 pages to work on. Here in the Philippines, an album with 10 pages costs, more or less, Php 500.00 (around
$12). In other countries, it may be cheap. But, for a single mom who wants to get more out of her money, I'd rather make my own because my money has better things to go to. :P
Of course, I am not against those who can afford them. :) If you can afford them, lucky for you. But, for crafty chicas who still want to continue scrapbooking on a budget, then this tutorial's for you.
Materials:
- Chipboard
- Scissors
- Ruler
- Wrapping Paper (optional)
For this tutorial, I will be making standard 12 x 12 inch scrapbook pages. The number of pages you can make will vary on the size of your chipboard. The size I used is approx. 38.5 inches long by 26.5 inches wide. I was able to make 6 out of this size of chipboard. Also, the size you want your pages to be will also determine how many you can make with a sheet of chipboard. So, I will be giving the general idea, and you can adapt depending on the size you want.
 |
| Measurements |
- For measurements, you can click here for a guide so you can easily understand how to measure out the chipboard. But, the main idea is that each page should measure 12 inches by 13 inches. Why an extra 1 inch on one side? We'll get to that later. Again, depending on the size of your chipboard, the number of pages will vary.
- Once you have measured everything out, simply cut out where necessary.
- Score the extra inch. The reason for this is so you have an area where you could bind your pages. If you just want a single 12x12 inch page, then you can just omit the extra inch. But if you want to bind your pages and would not want to sacrifice space on your layout, then the extra inch would be very useful.
- Voila! Your very own scrapbook pages.
Even without the steps, it is very much easy to understand.
Notes:
- You can use standard 12x12 sheets to use as background to decorate your pages. The chipboard will serve as a sturdy base for your layouts.
- OR, if you want to get extra thrifty, why not use wrapping paper? On 1 sheet of wrapping paper, I get to cover 2 pages. You can use leftover wrapping paper you have lying around and put them into good use.
How I bind the pages
I use post screws to bind my pages. This is how they look like if you don't know what post screws are:
I then punch the 1 inch area, 3 inches in from each side. Here is what I mean:
I simply punch them with my trusty puncher...
So, there you have it. Hope you enjoyed my simple tutorial. Hopefully, you'll find it helpful in your future scrapbooking projects. ;)
If you have any thoughts, I'd love to hear from you. :)
Cheers!

 Add it to your boards!


Oh my gosh! Marielle this is complete Genius! I can't afford albums either. The budget will only stretch so far, but I would love to have some to organize my paper scraps in, so this is a very welcome idea. Thank You!
ReplyDeleteGlad you liked it. :) I try to make the most out of my hard-earned money than buy something I could make myself. :) It's a little more of hard work, but it's all worth it in the end. :D
Delete