Saturday, January 12, 2013

{Project Life: A4 Style} Week 1 -- January 1 - January 6

Yay! I am so excited with this year's project I've been planning. I've decided to join in the Project Life fun! However, I am doing it my way. Since, I am being thrifty and can't afford to purchase real Project Life merchandise from Becky Higgins, I have decided to make mine from scratch (well, with the help of free PL printables I have collected from Pinterest!).

Also, to make it easier for me to find supplies, I have decided to make my Project Life in A4 style sheets. This is because these are readily available at the nearby bookstore and does not cost me that much. That way, I can still enjoy doing the project without having to break the bank. :)

Just a quick introduction on my own PL style, I have used a couple of alternative supplies that can be easily found. For my PL album, I have decided to make use of a clear book (those that you buy from the office supplies' store which is basically a book with clear pockets inside so you can slip in sheets of paper). For the sheets I slip into the pockets, I have used overhead projector sheets (aka acetate sheets) to adhere my PL journaling tags and photos to. That way, it appears to look like a real PL album or page. All are in A4 size.

So, this is for Week 1 (Jan 1 - 6). Basically just me and BabyLove's activities for the first week of 2013. :)

The whole page for Week 1. :) 
Page 1

Page 2


Upper row of photos is a photo of me illustrating hand numbering (I don't know what the heck to call it) 2-0-1-3. :)

Some of the journaling tags or photo mats I used on this project are actually note pads from Papemelroti. They have these wide range of kraft paper note pads that I just love and would go with almost any color theme. Here, it can be seen as a mat for my photo.

Some of the letters I used I cut from my Craft Robo, and covered them in glitter glue, because I don't have any Letter Thickers readily available to purchase. So, I make them myself. I have also used fabric tapes for embellishments.

 Sorry for the crappy photos. I just took these photos from my phone because I could not find my digital camera. >.< Nevertheless, I hope you see them.

I still have a lot of room for improvement. I feel that my page is still a little bit bland and flat and boring. >.< Please, please, PLEASE do share me your thoughts on how it looks and any advice if you have. I really do appreciate the feedback, good or bad. I really need the comments to improve myself. :)

Anyways, that's that. If you want to join in the fun, simply share your Project Life project with the link to your blog post below.


 Loading InLinkz ...

Cheers!
Pin It Add it to your boards!

New Year, New Project Life!

Hiya Guys!

I know it's been a while. A very LONG while, in fact. Been busy with work and I barely had time to do crafts like I used to before.

I hope everyone is having a good 2013 so far. :) As for me, I am hoping that this 2013, I will be able to blog more frequently just like I used to before. That will be one of my New Year's resolutions. ;)

To start of the year, I have actually started a new project. I am motivating myself to capture every single moment of my daughter's life as much as I can, no matter how shallow or how important it is. After all, it's always good to look back on something, especially during their childhood. So, I have planned since last year that I will be starting a Project Life book. Since a lot are getting into it, I thought to myself, why not?!

I was actually brewing up a fun way to connect with people for this project I have for 2013. But again, as mentioned, I have been busy for the last few months that I was not able to tend to it as much as I can. Yet, it still isn't too late to join in the fun. My plan is to have some sort of link party of blog hop to those who want to join in the fun. No prizes at stake, just something to do for fun. After all, we deserve a little break from our stressful work, right?

So, if you are still interested, please do leave a comment below, and I shall push through. Nevertheless, I will still be creating a link party of some sort below my posts, so anyone who's interested can join anytime they want. :)

If you want to see what I did for my week 1 of Project Life, see my next post!

Hope to see you all there! ;)

Cheers!
Pin It Add it to your boards!

Tuesday, September 18, 2012

Project Life 2013 Plans: Featured Free Downloads

How is everyone doing? :)

Well, to all my crafty friends out there, I just want to let you in my plans for the Project Life 2013. :D But, before that, let me just say that I am so happy that I already have 4 who signed up! Woohoo!!! It does not matter how little or many are interested. I am just glad that someone was interested to join in the fun!

So, going back...

As the title states, I plan of posting weekly featured free downloads for Project Life. Since my aim is to make this project as easy to make as possible, I want to make it even easier by providing you guys sources of great Project Life downloadables. How does that sound? I think it's pretty great! I love freebies myself, so I am pretty much excited about it.

I might even be planning to make some of my own (if they are any good) and share 'em with you guys. Hopefully, if time allows me, too. :)

If you haven't done so yet, don't forget to sign up if you want to join the fun. :)
Project Life 2013 Sign Up Form

Cheers!
Pin It Add it to your boards!

Friday, September 7, 2012

Thrifty Alternatives for 'Project Life' Materials


Hey all!

Here I am yet again with another post. So, I've been browsing around Becky Higgins' website, and I thought that Project Life does not require you to purchase items meant for the project. Why not adapt office supplies or craft materials available within our reach instead, right? That way, we save, we don't get frustrated, and we get to do the project just like anyone else, yes?
Pin It Add it to your boards!

Wednesday, September 5, 2012

'Project Life' 2013 Project: My Tips, Ideas and more

Hiya all!

Just recently, I posted a project idea I had in mine on my personal blog which you could find here. And, I thought I'd share a little more tips and ideas for my Project Life 2013 Plan.

Included in this post are:

  • Materials and tools to get you started
  • Who can do Project Life?
  • How often do you need to work on your Project Life?
So, without further ado, let's get going...

Materials

Okay... So, when I first found out about Project Life, I found that items and materials are easily obtained through Becky Higgins' website. This is why it really makes it appealing to non-crafters as they do not really need any crafting abilities to be able to build their Project Life. Available on Becky Higgins' website/shop are the basic materials such as binders and pocket pages. But, I think the most interesting items she has are core kits which include journaling cards which you could simply slip into the pocket pages and you are good to go. They are already readily decorated, so really, no need to embellish if you don't want to. 

But, for one like myself who find the items way out of my budget or simply unavailable in my country/area, I thought that I could actually make one with items you find at office/school supplies. Here are the main items you need to get started:
  • Book Binder
  • Pocket Page refills
  • Scissors
  • Pens
  • Photos, Memorabilia
  • Patterned Cardstock/Paper
Pretty basic, right? I actually haven't checked the nearest office supplies store yet for the pocket page refills, but I am sure I found some before. Haha. But, rest assured, I will check on that and update this post/blog. If there aren't available, I sure will find ways to improvise. ;)

Who can do Project Life?

Trust me when I say that ANYONE can do it! All you have to do is compile pictures or tokens that make a certain week or month memorable. It could be anything or everything, it all is up to you. :) You can make it as fancy as you want, as simple as you want. Does not matter. What matters is that you get to capture every memorable moment as possible. 

How often do you need to work on your Project Life?

Well, depending on the theme you choose, then that will determine how often you should do Project Life. If you think you don't have much time to work on it, do a monthly themed project life, capturing the most memorable moment each month. If you are up to the challenge of capturing unforgettable moments weekly, then a weekly themed project would be perfect. If you are more into family gatherings, then maybe a family themed project works best. Just put it this way: do your project life when you feel the need to. It's all depending on the time you have. No pressure at all...

And, as a bonus, I am thinking of even doing and making freebies for the non-crafty blogger friends who wants to join in the fun. Just like what you see on the Project Life core kits, I will try to come up with my own version of ready to use journaling cards. All you have to do is print and cut to size! How's that sound? 

If you haven't seen my post, you can read back on my personal blog here.Well, if you are up for it, please do sign up on the form below. I know it's pretty early, but, it never is too early to plan out everything. :) Besides, I am excited! So, hopefully you guys would join me and we could link up! 


Cheers!
Pin It Add it to your boards!

Friday, June 15, 2012

{DIY} Inked Edges, Vintage/Distressed Look

So, it's been a while since last post, and I am back with another DIY.

Adding a vintage feel to our cards or scrapbook pages has never been easier, thanks to "distressing inks". And they come in a wide variety of colors to suit your needs.

However, if you are like me with no distress inks sold nearby or is putting a hole in our pockets, it shouldn't limit us from achieving that vintage look.

So, are you ready to know what I use? Drumroll, please!!!

Acrylic Paint!

Yep, it's possible because I wont be sharing this with the world if it isn't. Haha! Below is a photo of my inked up edges on my cards using acrylic paint.


Materials:
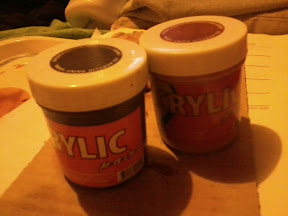
» Arylic paint (brown, black or any other color to make it look vintage)
» Water
» 2 sponges (makeup sponge and just another regular flat sponge

So, all I do is dilute the acrylic paint with water, depending on how strong I want the color to be. If you want it to appear darker, use very minimal water, adding just a little bit at a time until you get the desired look. This may involve a lot of testing. If you like it lighter, just add more water. Some use salt to thin the acrylic paint, however i haven't tried it out yet. Let me know if you gave it a go and how it turned out.

Note: the appearance of a particular mixture may look different from 1 colored cardstock with another. Experiment with different colored cardstocks with different mixture consistencies.

Next, simply pour a little amount at a time on the flat makeup sponge. The reason for this is so that you don't soak your sponge applicator too much to avoid soaking the edges of your card or whatever it is you want to ink up.

With your sponge applicator, simply dab onto your "ink pad" and apply to the edges of the cardstock. The circular blending technique used with distressing inks may not work for this because of the mixture made up of water. Instead, brush the sponge OUT towards the edge of the cardstock. Again, experiment on how to apply it to get the desired look.

And that is pretty much it! This is just another of the many uses of arylic paint! Let me know what you think of this technique and if you decide to try it out. Below are more pictures of my DIY! Thanks for taking the time to read!


Pin It Add it to your boards!

Wednesday, May 16, 2012

{Show & Tell} Mother's Day Cards

Here is another post for "Show & Tell". These are just some Mother's Day cards I made for my aunts and grandma. So, for all the moms out there, a belated Happy Mother's Day!!!
Pin It Add it to your boards!

{Show & Tell} Birthday Explosion Box -- Coffee Theme

Hiya everyone. It's been a while since my last "Show & Tell" and I am very excited to show you guys an explosion box I made for my fave barista at Starbucks.
Pin It Add it to your boards!

Saturday, April 28, 2012

{Show and Tell} Graduation Card

It's been a while since my last post. This is just going to be a very quick 'Show and Tell' on a card I have made. It's for all the graduates of this year! I actually made this card for my cousin who just graduated last Thursday.

For the card base, I used a metallic gold or light brown card stock.

I made the layout using the Silhouette Studio software. The reason for this is so that I could cut the shapes I need in the correct size so it would fit the card perfectly.

The mat behind "Happy Graduation" is also a metallic cardstock in dark brown. The circles I just cut out with my trusty scissors.

To give depth and definition to the background of the owl, I inked it up with a DIY brown spray paint I made (a tutorial I might come up with in the future to share so watch out of it).

As for the "Happy Graduation" mat, I made the edges look "aged" by rubbing ordinary dustless chalk in brown and blended it out with my fingers. (Again, a tutorial of this will come up on future posts)

So, if you are wondering why I used my DIY spray paint and chalk to make my papers look "aged", that is because I haven't got the chance yet to buy distress inks which, again, are expensive from where I come from. However, I do plan to buy at least one color in a brown shade for these "paper looking aged" purposes.

So, there you have it. Tell me what you think, I'd love to read your comments. :)

Cheers!

Pin It Add it to your boards!

Saturday, March 31, 2012

{DIY} Chipboard Scrapbook Pages


Have you ever made scrapbook pages from scrap? Well, I do. I have never bought pre-made scrapbook albums, EVER. I have only made my own. And what better material to use than plain chipboard. Yep, you read that right. Want to learn how to make your own? Then read on.
Pin It Add it to your boards!